
What Are the First Steps to Start a Website?
Starting a website is an exciting journey, whether it’s for a personal blog, business, or online store. But with so many tools and terms out there, beginners can easily feel overwhelmed. The good news is that launching a website doesn’t have to be complicated if you take the right steps from the beginning.
In this guide, we’ll walk you through the first essential steps to start a website, even if you have zero technical experience.
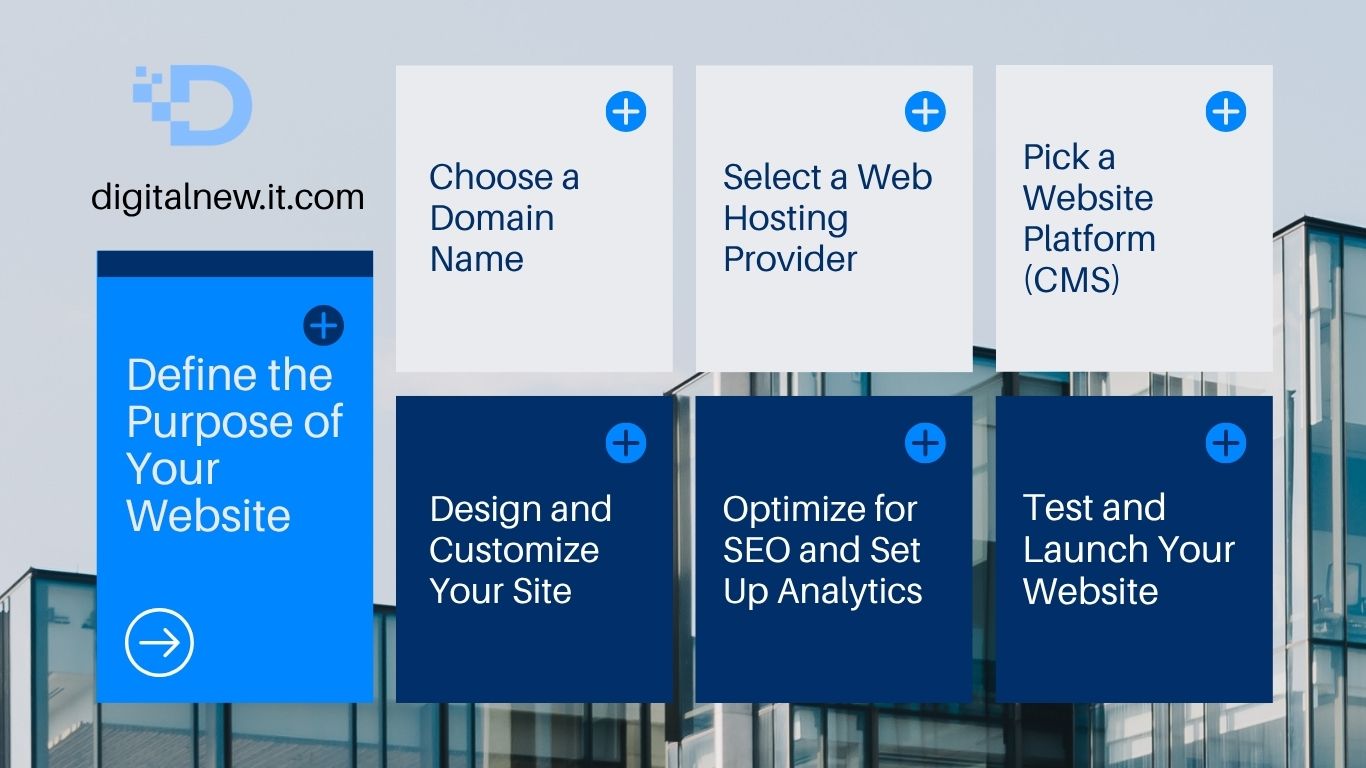
Step 1: Define the Purpose of Your Website
Before diving into the technical aspects, take a moment to ask yourself: Why do I want to create a website? Knowing your goal helps shape everything else, from design to content.
Common Website Purposes:
-
Personal blog or portfolio
-
Business website
-
E-commerce store
-
Non-profit or community project
-
Informational or educational platform
Being clear about your purpose helps guide your decisions in the next steps.
Step 2: Choose a Domain Name
Your domain name is your website’s address on the internet (like www.yourname.com). It should be memorable, easy to spell, and relevant to your brand or content.
Tips for Choosing a Domain:
-
Keep it short and simple
-
Avoid numbers and hyphens
-
Use keywords if possible
-
Check availability with domain registrars like GoDaddy, Namecheap, or Google Domains
Once you choose a domain, register it to ensure no one else takes it.
Step 3: Select the Right Web Hosting
Web hosting is where your website lives on the internet. It stores your website files and makes them accessible online. There are various types of hosting services depending on your needs and budget.
Common Hosting Options:
-
Shared Hosting – Affordable and good for beginners (e.g., Bluehost, HostGator)
-
VPS Hosting – More power and flexibility for growing sites
-
Dedicated Hosting – Full server for large websites with high traffic
-
Managed WordPress Hosting – Optimized for WordPress users
Most hosting companies offer domain registration as well, which makes setup easier.
Step 4: Choose a Website Platform or CMS
A Content Management System (CMS) allows you to build and manage your website without needing to code. The most popular CMS is WordPress, powering over 40% of all websites.
Other Popular Website Builders:
-
Wix – Drag-and-drop builder with customizable templates
-
Squarespace – Great for design-heavy sites
-
Shopify – Ideal for online stores
-
Webflow – More control for advanced users and designers
Choose a platform based on your needs, technical skill, and design preferences.
Step 5: Plan and Create Your Website Content
Now it’s time to create the actual pages for your website. Typical websites include:
-
Home Page – Introduces your brand or purpose
-
About Page – Shares your story or company background
-
Services/Products Page – Lists what you offer
-
Blog – For sharing news, tips, or insights
-
Contact Page – Includes a form or email address
Make sure your content is clear, engaging, and optimized for search engines (SEO).
Step 6: Design and Customize Your Site
Most website platforms come with themes or templates. Choose one that fits your style and industry. Then customize colors, fonts, layout, and images to match your brand.
Web Design Tips:
-
Keep navigation simple and intuitive
-
Use high-quality images
-
Ensure mobile responsiveness
-
Make calls to action (CTAs) clear (e.g., “Contact Us”, “Buy Now”)
Step 7: Set Up Basic SEO and Analytics
Search Engine Optimization (SEO) helps your website rank on Google and attract visitors. At the very least, you should:
-
Use SEO-friendly URLs
-
Add meta titles and descriptions
-
Include relevant keywords naturally in your content
-
Submit your sitemap to Google Search Console
-
Install Google Analytics to track traffic and behavior
Many platforms (like WordPress) have SEO plugins like Yoast SEO or Rank Math that make this easier.
Step 8: Test and Launch Your Website
Before going live, test your website on different devices and browsers. Check for:
-
Broken links
-
Slow-loading pages
-
Grammar and spelling errors
-
Functional contact forms and buttons
Once everything looks good, hit “Publish” and share your website with the world!